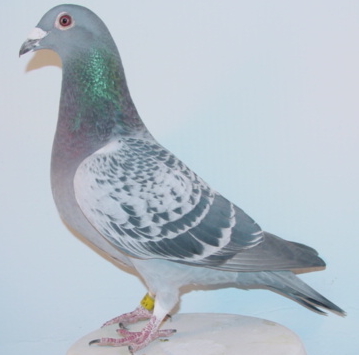
Building A Simple Photo BoxBy Alex Cornella I have been experimenting with capturing my pigeons in photos for many years with varying degrees of success. Not long ago I took a 30ö x 30ö cardboard box a computer came in and set it up in my garage. I cut holes in the front, top, sides and front, and then spray-painted the inside of the box. At first, I used blue paint and later went to white background. It ainÆt pretty, but it gets the job done.
I installed three lights, one on top and two on the sides. The light fixtures on the sides are aluminum work lights that you find in the hardware store with 40-watt bulbs. The light on top is an old fluorescent fixture. I painted a nest bowl gold, but decided I liked white better, and turned it upside down to give the birds a perch. I use a long-handled, narrow paintbrush to position the bird and smooth ruffled feathers. I try to remember to wash the birdÆs feet before snapping its picture. Initially, I employed a 35 mm camera with a short lens and 200 ASA film. The results were reasonably good; however, the cost of film and processing was a bit expensive considering usually one or two photos per roll are keepers. More recently, I graduated to a digital camera I like very much and has more features than I will ever be able to comprehend. With the digicam, you know immediately if a shot is good and you can crop out objectionable background like inevitable pigeon droppings. The camera I use is a Sony CD Mavica (3.3 mega pixels) that cost around $500. The Mavica records the images on a mini CD disk that I can pop into my computer without fooling with wires, which is a great feature. The key to purchasing a digital camera for this purpose is to get one with the most mega pixels you can afford. The more mega pixels, the better quality of the images. Although I am not completely satisfied with the results ¢ there are still some shadows in the images ¢ my pigeon photos have come a long way. While they are not as good as the photos the professionals take, they are reasonably good and getting better.
Of course, positioning the bird takes patience and practice. Not all birds are calm and cooperative, or stand nicely for a photo. I speak to the bird softly, gently prodding him with the paintbrush until I have a good position and take many shots. When I finally get a good image, I am rewarded with a feeling of satisfaction and accomplishment. |